 Written by Megan Smith, PT
Patient positioning is critical in promoting recovery, comfort, and safety. This is especially true for individuals with limited mobility. Proper positioning helps prevent complications such as pressure ulcers, respiratory issues, and joint contractures. Over 2.5 million people in the U.S. develop pressure ulcers each year. This highlights the importance of patient positioning to minimize injury. This comprehensive guide will explore patient positions in bed, transfer devices, and methods for safely transferring patients.
The goal of patient positioning is to maximize safety and comfort and promote the best medical outcomes. Correct positioning supports safe medical procedures, improves circulation, and reduces complications. Properly positioning your patient will help prevent pressure ulcers, nerve damage, and complications.
Proper patient positioning is crucial for preventing adverse health outcomes. Bedridden patients, those with limited mobility, and post-surgical patients rely on their caregivers to ensure their comfort and safety. Correct positioning can help prevent pressure injuries, skin breakdown, nerve damage, and circulation issues.
Trendelenburg positioning is commonly used in surgical settings, particularly for lower abdominal procedures or the placement of central venous catheters. In this position, the patient lies flat on their back with their head positioned lower than their feet, typically at a 16-degree angle, though it may be increased to as much as 40 degrees when necessary. Securing the patient properly on the operating table and limiting the time spent in this position is crucial to minimize complications.
.jpg&newwidth=365&maxheight=200) | Adjustable Electric Bed with Trendelenburg Function - Valiant by Transfer Master View Product |
In the reverse Trendelenburg position, the patient lies on their back with their head raised higher than their legs at a 15 to 30-degree angle. This position is used in some surgical and laparoscopic procedures and may also help with symptoms of gastric reflux.
 | Trendelenburg Capable Imaging Table with Adjustable Backrest and Footrest View Product |
In the modified Trendelenburg position, the patient lies on their back with their head level to the body and their legs elevated. This position commonly treats shock by increasing blood flow to vital organs. This position also helps to raise blood pressure when it is low.
 | Trendelenburg Capable Imaging Table with Adjustable Backrest View Product |
The lateral position is the side position. The patient may lie on the right or left side with the legs flexed. They may use pillows between the knees for comfort and support. This position is often used in the surgical setting when procedures require side access.
 | Latex-Free Lateral Positioning Device Pads View Product |
This position is often described as being similar to a typical sleeping position, where the body lies horizontally. It may involve lying flat on the back, or supine position, but can also refer to the patient lying on their stomach, or prone position.
 | MAT Medical and Therapy Body Positioning System by Core Products View Product |
The semi-recumbent position involves elevating the head of the bed between 30 and 45 degrees. This position can help reduce the incidence of ventilator-associated pneumonia (VAP) and alleviate gastric reflux.
 | ComfortEZ Clinical Bariatric Infinite Position Geri Chair View Product |
The lateral recumbent position is when a patient lies on their side, either left or right, with legs slightly bent. This position provides easy access to the side of the body. It is ideal for certain surgeries, like lung or kidney procedures. It also works for diagnostic tests, like echocardiograms, requiring side access. Additionally, it helps improve breathing in patients with respiratory issues.
 | Patient Sling for Lifts - Twin Turner Sling for Lateral Positioning - 560 lbs. Capacity by Guldmann View Product |
In this position, the patient lies on their back with knees bent, feet flat, and legs slightly apart. This posture can be achieved passively, with an adjustable bed, or actively by bending the knees and positioning the feet flat on the surface. This position is frequently used in childbirth or during gynecological examinations.
In the prone position, the patient lies flat on their stomach. This position is often used to improve oxygenation in patients with respiratory distress or during back surgeries.
 | Pron-Pillo Face Cradling Pillow for Prone Positioning View Product |
In the supine position, the patient lies flat on their back with their face upward. This is a common sleeping position and is also the position most patients are in when being transferred from a bed to a stretcher.
 | Skil-Care In-Bed Resident Positioning System View Product |
In the Fowler’s position, the patient is sitting in a semi-seated position with the head of the bed raised between 45 and 60 degrees with the legs straight or slightly bent. This position aids in easier breathing, particularly for patients experiencing respiratory distress.
 | Adjustable Height Sleep to Stand Twin XL Bed - Envyy by Platinum Health View Product |
Semi-Fowler’s position is similar to Fowler’s, but the head of the bed is raised between 30 and 45 degrees. This position also supports easier breathing and can provide added comfort during childbirth.
 | Twin-Size Electric Metal Bed Frame by Vive Health View Product |
Sim’s position is also known as the left lateral position. The patient lays on the left side with the left leg straight. The right leg is bent at the hip and the knee. This position is often used for enema administration or rectal exams.
 | Posey Bead Filled Lateral Wedge Supports View Product |
The knee-chest position involves the patient kneeling with their chest down, often used for rectal exams or during certain obstetric procedures. The patient can also be on their back with the knees flexed to the chest.

In the orthopneic position or tripod position, the patient sits up and leans forward, resting their arms on a table or pillows. This position helps improve breathing, especially in patients with respiratory conditions like COPD. It is also useful for certain procedures, such as lumbar punctures or epidural placements.
 | Infinite Position Geri Chair - Preferred Care Recliner Series View Product |
Turning a patient in bed is necessary for preventing pressure injuries and promoting circulation, making it a key aspect of proper patient positioning in bed. When done alone, it requires careful technique to avoid caregiver strain. There are several methods, including using powered devices or manually turning patients. Below are the steps to manually turn a patient safely when alone:
Slide sheets, or draw sheets, are designed to make repositioning easier by reducing friction between the patient and the bed. They are valuable for caregivers, as they help prevent injury during patient handling. Slide sheets can be used to turn a patient or lift them up in bed. Below are the steps to follow when using a slide sheet:
A patient transfer lift can be manual or powered. They are used to safely transfer patients from one location to another, such as from bed to wheelchair, without strain on the caregiver. These devices are especially helpful for patients with limited mobility, providing a secure and comfortable way to move between positions.
Patient lift transfer chairs are designed to improve mobility and comfort for patients with limited or impaired movement. They are usually portable and can be used to move a patient from the bed to a chair and to other spaces in the home or facility. Some are even equipped with a toilet bucket.
Wheelchair transfers are used when a patient is unable to stand or support themselves independently. Transfers are made from the wheelchair to various surfaces, such as a chair, bed, tub, toilet, or car.
Getting in and out of a car can be a challenge for people using wheelchairs for mobility. Various methods can be used to assist in these types of transfers. Car slide sheets, swivel cushions, and vehicle straps can help make this process easier for both the caregiver and the patient.
 | CarCaddie Vehicle Assistance Strap View Product |
Transfer Board for Wheelchairs
A transfer board helps to move patients between two surfaces. It is a flat, sturdy board made of wood or plastic. This tool offers several advantages, such as enabling movement between surfaces without relying on leg strength. It allows for a series of smaller, controlled motions instead of a single large movement, and it requires less upper-body strength compared to other transfer methods.
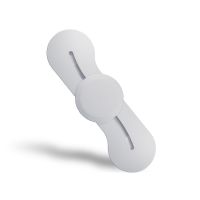 | BeasyTrans Original Transfer Board With Rotating Seat View Product |
Wheelchair-to-Car Transfer Lift
Wheelchair-to-Car Transfer Lifts are designed to allow a single caregiver to assist in safely and smoothly transferring an individual to and from a car. Most lifts can support transfers from ground level up to over 60 inches, accommodating the height of larger vehicles like SUVs and trucks. Here is how to use this type of lift:
 | BestLift Patient Lift for Car Transfers View Product |
Transfer Patient from Bed to Chair
There are several methods for safely transferring a patient from a bed to a wheelchair. Before selecting a patient transfer device, assess the level of assistance required for a safe transfer. Common options include using a gait belt for manual support, a grab bar for stability, or a floor or ceiling lift for full assistance. Here are the steps for a patient that can assist with the transfer:
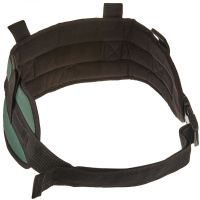 | Sammons Preston Padded Gait Belt View Product |
For patients who require full assistance, a transfer lift should be used. Follow these steps if using a transfer lift to move the patient from the bed to the wheelchair:
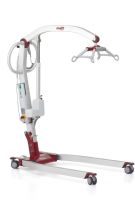 | Molift Smart 150 Lightweight Portable Patient Lift View Product |
Slide Board Transfer from Bed to Wheelchair
Assist individuals with limited upper body strength in moving from one surface to another. Slide boards minimize fall risks and reduce the likelihood of leg or back strain for caregivers. While seated on the board, the patient’s upper body is stabilized by the caregiver, who smoothly slides the patient from the bed to the wheelchair without requiring any lifting.
 | Wooden Transfer Board with Cut-Out Handles from Drive Medical View Product |
Sit-to-stand transfer devices help both the patient and caregiver safely lift the patient from a sitting to a standing position and vice versa. These are used in all settings from hospitals to homes and are available in powered and manual options.
There are several sit-to-stand devices that offer safe transfers for both the patient and caregiver. A few examples are:
 | Sara Flex Electric Sit-to-Stand Patient Transfer Aid by ArjoHuntleigh (FULLY ASSEMBLED) View Product |
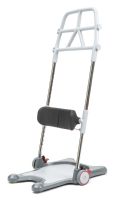 | Molift Raiser Pro Sit-to-Stand Patient Lift View Product |
The sit pivot transfer uses a swivel motion to move a seated patient to another surface, such as a chair or bed. Swivel cushions are a great option for this type of patient transfer. They can be used in the home, office, or car.
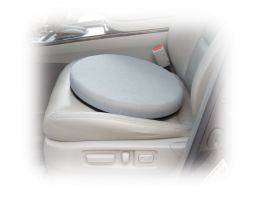 | Drive Medical Padded Swivel Seat Cushion View Product |
The stand pivot transfer is ideal for patients who can bear weight while standing but lack the strength to walk independently to another seat. In this transfer, the patient is helped to stand and then guided to pivot toward the next seated position with support.
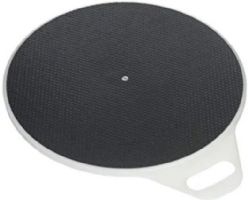 | SafetySure Transfer Pivot Disc View Product |
A toilet transfer assists individuals with limited mobility in safely moving to and from the toilet. There are several methods to support this transfer. They often involve assistive devices or caregiver support.
Toilet Transfer Chair
Toilet transfer chairs and benches are designed for use in the bathroom, assisting with transfers from the toilet to the tub, wheelchair, or shower chair. These transfer chairs are essential for ensuring safety during bathroom use.
 | ArGo Varying Heights Electric Toilet Lift with Rechargeable Battery - 440 Pound Weight Capacity View Product |
Toilet Wheelchair
A toilet wheelchair, or shower chair with wheels, is a bathroom wheelchair designed for easy movement over the toilet or in the shower. Its waterproof construction and wheeled base make it ideal for assisting with hygiene and toileting needs.
.jpg&newwidth=365&maxheight=200) | Shower Buddy Rolling Transfer | Shower | Toileting Chair with Cutout View Product |
Safe and effective patient positioning and transfers are fundamental parts of caregiving. They ensure patient well-being and protect caregivers from strain and injury. Using specialized tools like slide sheets, transfer boards, and various patient lifts helps create a safe, supportive environment, particularly when managing patients who require frequent movement assistance.
These tools are designed to minimize the physical effort needed from caregivers, reducing the risk of musculoskeletal injuries. With up to 30% of caregivers experiencing strain or injury annually, the use of proper transfer equipment and techniques is essential to sustainable patient care and caregiver health.
If you are looking for more resources on patient care, visit us at Caregiver University for articles covering a range of topics from mobility aids to caregiving tips and even tips on aging in place. Our goal is to empower caregivers with the knowledge and tools needed to provide the best care possible!

Megan has been a part of Rehabmart since its inception nearly 20 years ago. For the past several years she has been enjoying her role as HR Director while maintaining her Physical Therapy license. When she isn't working on her next in-service or working to find a new team member, she enjoys her five children, helping those who have PT type ailments, baking, practicing yoga, and working out.